Mazda 2: Climate Control Unit
CLIMATE CONTROL UNIT REMOVAL/INSTALLATION
1. Disconnect the negative battery cable.
2. Remove the following parts:
- Glove compartment (See GLOVE COMPARTMENT REMOVAL/INSTALLATION).
- Dashboard under cover (See DASHBOARD UNDER COVER REMOVAL/INSTALLATION).
- Heat duct (RH) (See HEAT DUCT COMPONENT REMOVAL/INSTALLATION).
- Rear console (See REAR CONSOLE REMOVAL/INSTALLATION).
- Shift lever knob (MTX) (See MANUAL TRANSAXLE SHIFT MECHANISM REMOVAL/INSTALLATION).
- Side wall (See SIDE WALL REMOVAL/INSTALLATION).
- Front console component (See FRONT CONSOLE COMPONENT REMOVAL/INSTALLATION).
- Front scuff plate (driver-side) (See FRONT SCUFF PLATE REMOVAL/INSTALLATION).
- Front side trim (driver-side) (See FRONT SIDE TRIM REMOVAL/INSTALLATION).
- Hood release lever (See HOOD LATCH AND RELEASE LEVER REMOVAL/INSTALLATION).
- Lower panel (driver-side) (See LOWER PANEL REMOVAL/INSTALLATION).
- Knee bolster (See KNEE BOLSTER REMOVAL/INSTALLATION).
- Center panel unit (See CENTER PANEL UNIT REMOVAL/INSTALLATION).
3. Remove in the order indicated in the table.
- Climate control unit
- Connector
4. Install in the reverse order of removal.
Climate Control Unit Removal Note
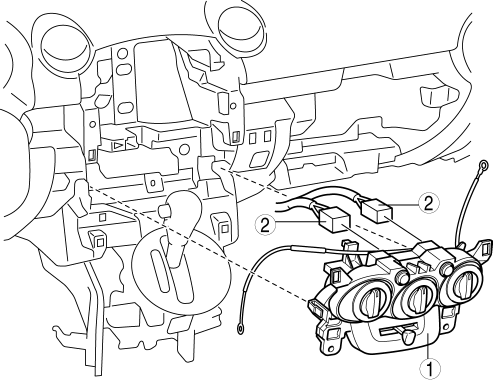
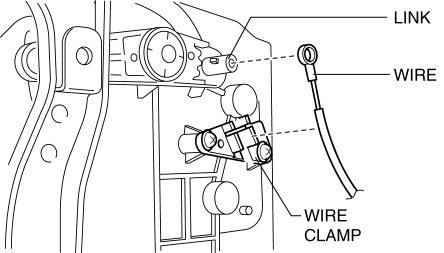
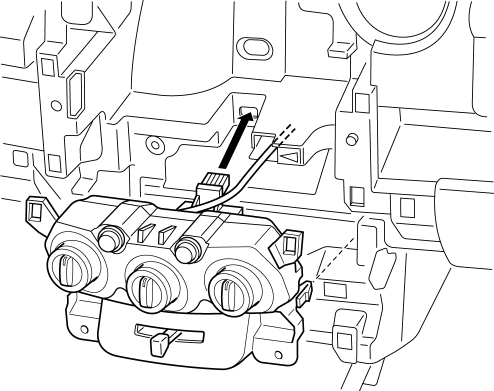
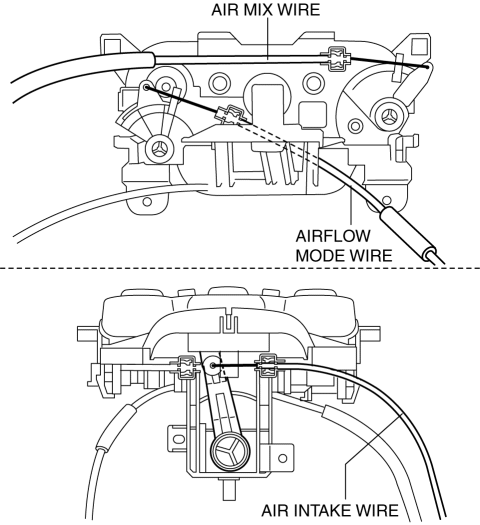
1. Disconnect each wire to links and remove it to the wire clamps.
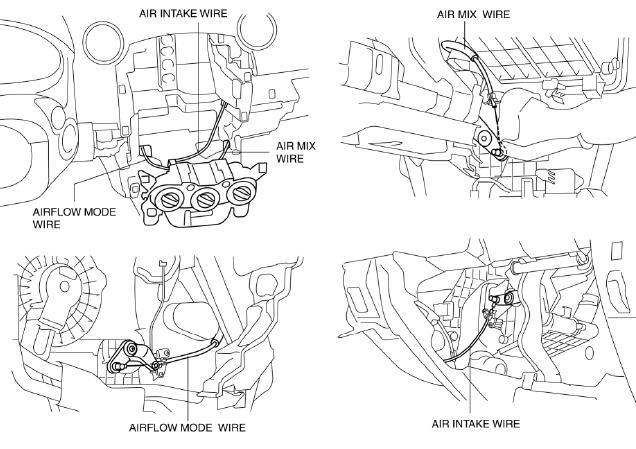
2. Pull out the air mix wire, airflow mode wire, and air intake wire from the dashboard.

Climate Control Unit Installation Note
1. Route each wire as shown in the figure.
2. Connect the climate control unit connector.
3. Install the climate control unit so that the convex part of the climate control unit passes the hole on the dashboard.
4. Set the dials and lever on the climate control unit as follows.
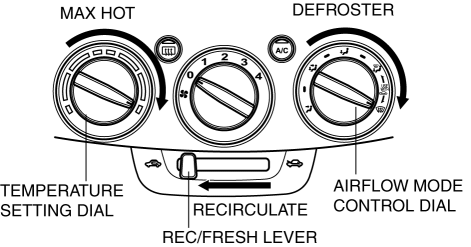
- Temperature control dial: MAX HOT
- Mode dial: Defroster
- REC/FRESH lever: REC
5. Connect each wire to links and install it to the wire clamps.
6. Verify that the dial can turn fully from one end to the other.
CLIMATE CONTROL UNIT DISASSEMBLY/ASSEMBLY
1. Disassemble in the order indicated in the figure.
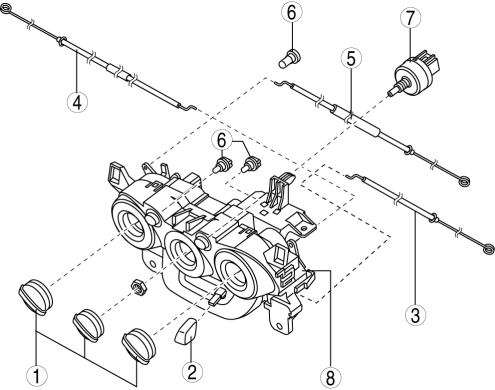
- Dial
- Knob
- Air intake wire
- Airflow mode wire
- Air mix wire
- Bulb
- Fan switch
- Climate control unit
2. Assemble in the reverse order of disassembly.
Wire Removal Note
1. Remove in the order indicated in the figure.
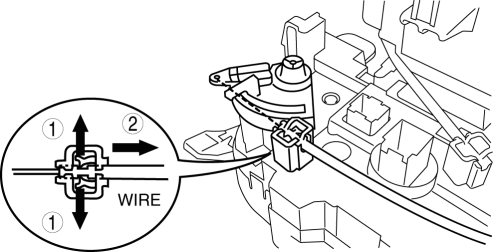
Wire Installation Note
1. Install as shown in the figure.
CLIMATE CONTROL UNIT INSPECTION
1. Remove the climate control unit with the connector connected. (See CLIMATE CONTROL UNIT REMOVAL/INSTALLATION [MANUAL AIR CONDITIONER] ).
2. Switch the ignition to ON.
3. Connect the negative (-) lead of the tester to the body ground.
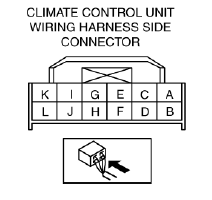
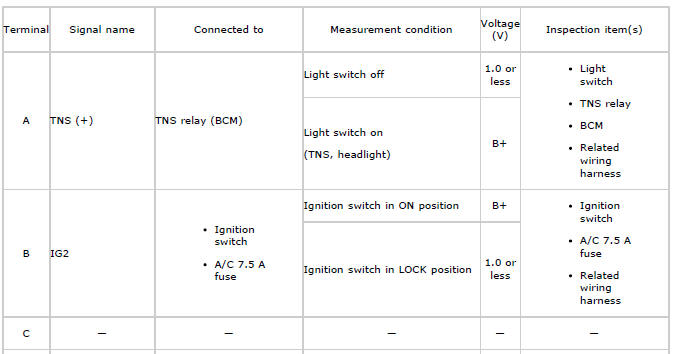
4. After inserting the positive (+) lead of the tester into the climate control unit connector, measure the voltage according to the terminal voltage table.
- If there is any malfunction, inspect the parts under "Inspection item(s)".
- If the parts under "Inspection item(s)" are normal, replace the climate control unit.
Terminal Voltage Table (Reference)

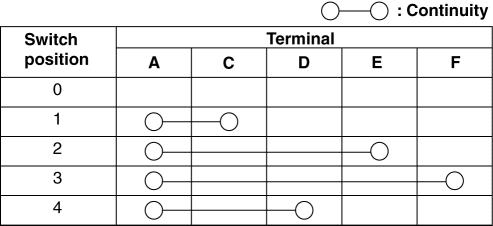
FAN SWITCH INSPECTION
1. Remove the climate control unit.
2. Inspect for continuity between the fan switch terminals using an ohmmeter.
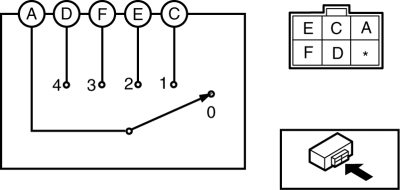
- If not as specified, replace the fan switch.
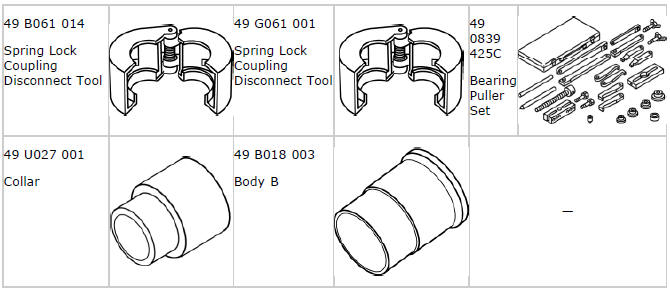
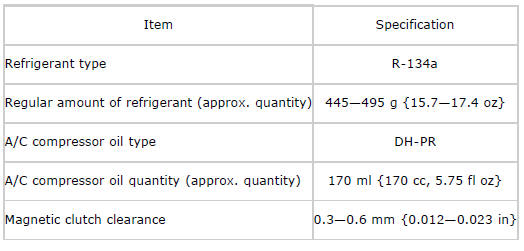
HVAC TECHNICAL DATA
HVAC SST