Mazda 2: Automatic Transaxle Shift Mechanism
AUTOMATIC TRANSAXLE SHIFT MECHANISM LOCATION INDEX
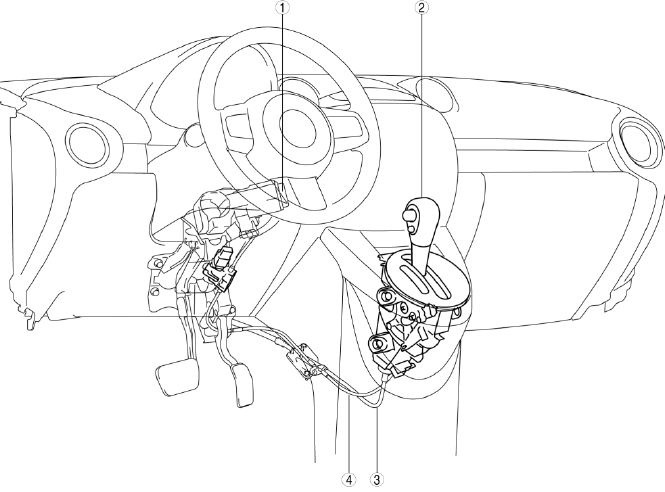
- Key cylinder
- (See KEY INTERLOCK SYSTEM INSPECTION.)
- Selector lever component
- (See AUTOMATIC TRANSAXLE SHIFT MECHANISM REMOVAL/INSTALLATION.)
- (See SELECTOR LEVER INSPECTION.)
- (See SHIFT-LOCK SYSTEM INSPECTION.)
- Selector cable
- (See AUTOMATIC TRANSAXLE SHIFT MECHANISM REMOVAL/INSTALLATION.)
- Interlock cable
- (See AUTOMATIC TRANSAXLE SHIFT MECHANISM REMOVAL/INSTALLATION.)
- (See SELECTOR LEVER INSPECTION.)
AUTOMATIC TRANSAXLE SHIFT MECHANISM REMOVAL/INSTALLATION
CAUTION:
- Water or foreign objects entering the connector can cause a poor connection or corrosion. Be sure not to drop water or foreign objects on the connector when disconnecting it.
Selector Lever component Removal/Installation
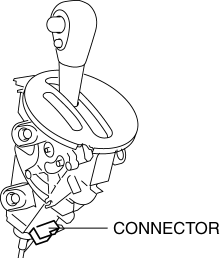
1. Disconnect the selector lever component connector.
- Disconnect the negative battery cable.
- Remove the side wall. (See SIDE WALL REMOVAL/INSTALLATION).
- Remove the front console component. (See FRONT CONSOLE COMPONENT REMOVAL/INSTALLATION).
- Disconnect the selector lever component connector.
2. Remove the selector lever component.
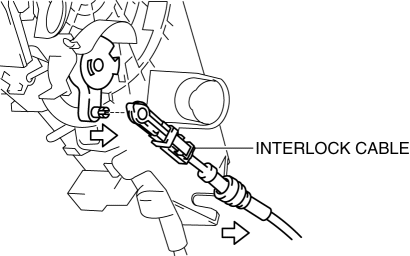
- Disconnect the interlock cable from the selector lever component.
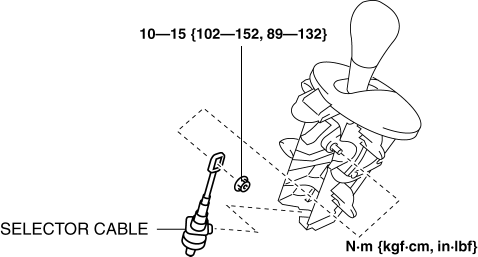
- Disconnect the selector cable from the selector lever component.
- Remove the selector lever component.
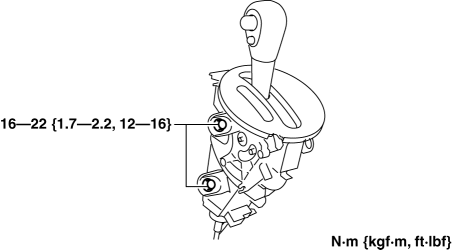
3. Install in the reverse order of removal.
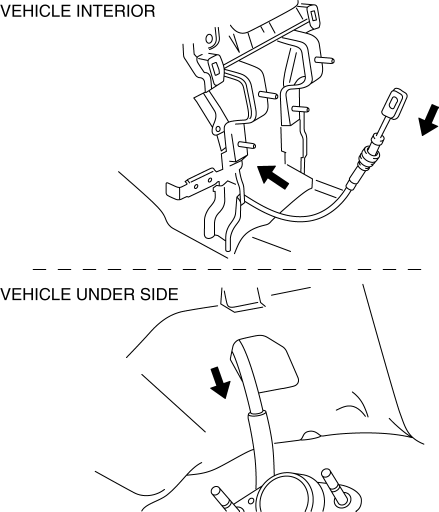
Selector Cable and Interlock Cable Removal/Installation
1. Disconnect the negative battery cable.
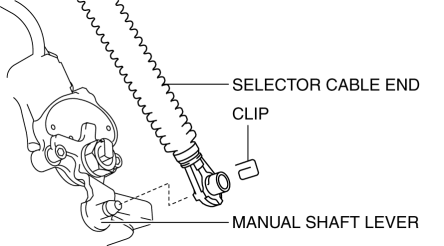
2. Remove the clip, and then disconnect the selector cable end from the manual shaft lever.
3. Disconnect the selector cable from the upper transaxle bracket.
4. Remove the insulator No.1 of the exhaust system. (See EXHAUST SYSTEM REMOVAL/INSTALLATION).
5. Remove the column cover. (See COLUMN COVER REMOVAL/INSTALLATION).
6. Remove the side wall. (See SIDE WALL REMOVAL/INSTALLATION).
7. Remove the front console component. (See FRONT CONSOLE COMPONENT REMOVAL/INSTALLATION).
8. Remove in the order indicated in the figure.
9. Install in the reverse order of removal.
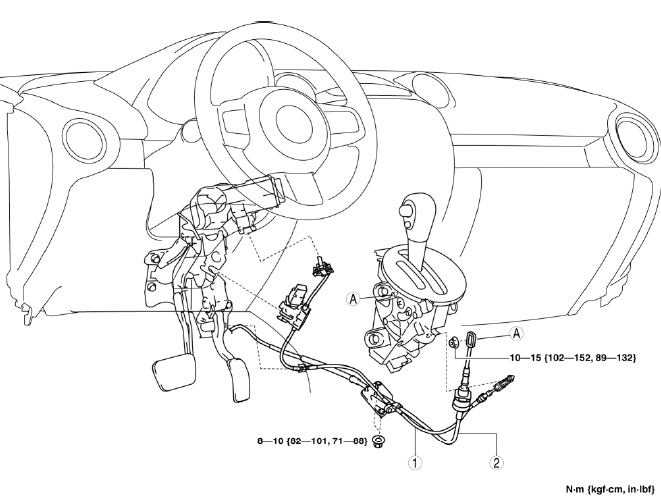
- Interlock cable
- Selector cable
Selector Cable Removal Note
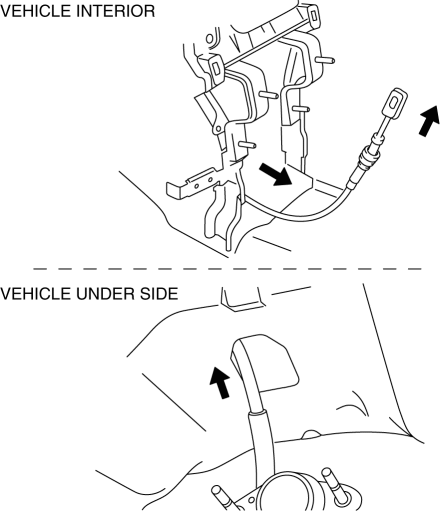
1. Working with two people, one person pushes the ends of the selector cable toward the inside of the vehicle, and at the same time, the other person pulls out the selector cable by pulling the ends of the selector cable.
Selector Cable Installation Note
1. Working with two people, one person pushes the ends of the selector cable toward the lower side of the vehicle from the inside, and at the same time, the other person pulls the ends of the selector cable.
Interlock Cable Installation Note
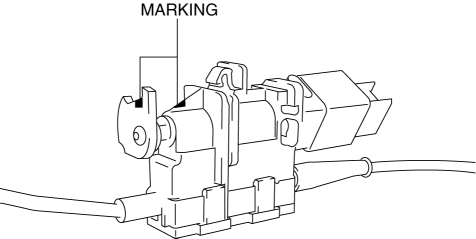
1. Install the interlock cable to the key cylinder.
- Switch the ignition to ACC.
- Install the interlock cable end to the key cylinder.
2. Install the lock unit to the brake pedal.
- Align the slide pin with the marking of the lock unit.
- Insert a snap pin (or a round bar of 1.5 mm {0.059 in} diameter) into hole A with the slide pin inserted completely.
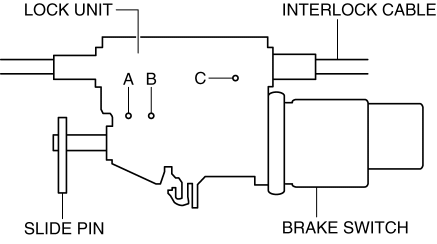
- Insert the other snap pins through hole B and hole C.
- Replace the brake switch with a new one. (See BRAKE PEDAL REMOVAL/INSTALLATION).
- Install the lock unit to the brake pedal bracket.
- Rotate the slide pin 90
READ NEXT:
ELECTRIC POWER STEERING (EPS) SYSTEM WIRING DIAGRAM ELECTRIC POWER STEERING (EPS) ON-BOARD DIAGNOSIS On-Board Diagnostic (OBD) Test Description The OBD test inspects the integrity and function of t Electric Power Steering (EPS)
WARNING: Always inspect the steering component carefully for any shock or impact which may have occurred during a collision or servicing operation. If a damaged part or a part suspected of bei General Procedures
