Mazda 2: Parking Brake System
PARKING BRAKE SYSTEM LOCATION INDEX
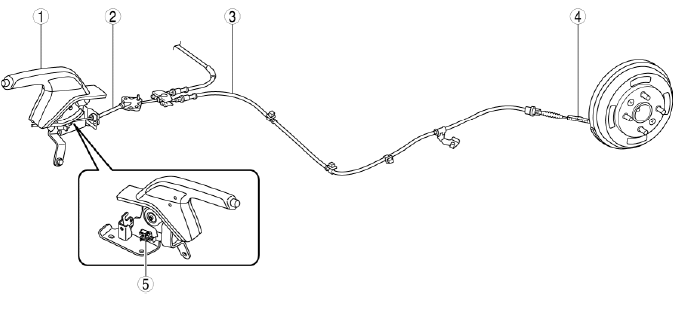
- Parking brake lever
- (See PARKING BRAKE LEVER INSPECTION.)
- (See PARKING BRAKE LEVER ADJUSTMENT.)
- (See PARKING BRAKE LEVER REMOVAL/INSTALLATION.)
- Front parking brake cable
- (See FRONT PARKING BRAKE CABLE REMOVAL/INSTALLATION.)
- Rear parking brake cable
- (See REAR PARKING BRAKE CABLE REMOVAL/INSTALLATION.)
- End cable
- (See END CABLE REMOVAL/INSTALLATION.)
- Parking brake switch
- (See PARKING BRAKE SWITCH INSPECTION.)
PARKING BRAKE LEVER INSPECTION
Stroke Inspection
1. Pull the parking brake lever two to three times.
2. Inspect the parking brake stroke by slowly pulling at point A 50 mm {2.0 in} from the end of the parking brake lever with a force of 98 N {10 kgf, 22 lbf} and counting the number of notches (clicking sound).
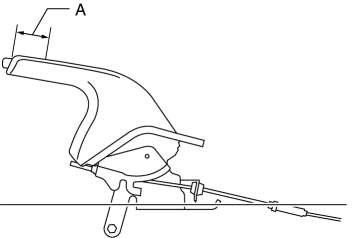
- If not within the specification, adjust the parking brake lever.
Parking brake lever stroke when pulled at 98 N {10 kgf, 22 lbf}
- 2-5 notches
PARKING BRAKE LEVER ADJUSTMENT
NOTE:
- After pumping the brake pedal a few times, adjust the parking brake lever.
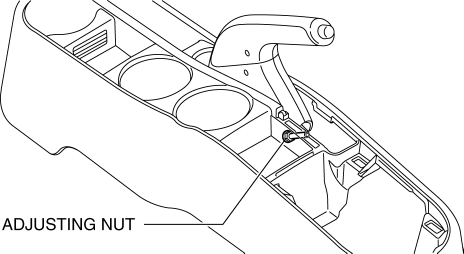
1. Remove the console panel. (See REAR CONSOLE REMOVAL/INSTALLATION).
2. Turn the adjusting nut as shown in the figure to adjust.

3. After adjustment, confirm the following points:
- If there is any malfunction, inspect the parking brake lever again.
- Pull the parking brake lever one notch and verify that the parking brake warning light illuminates.
- Release the parking brake lever completely, and verify that the rear brakes do not drag.
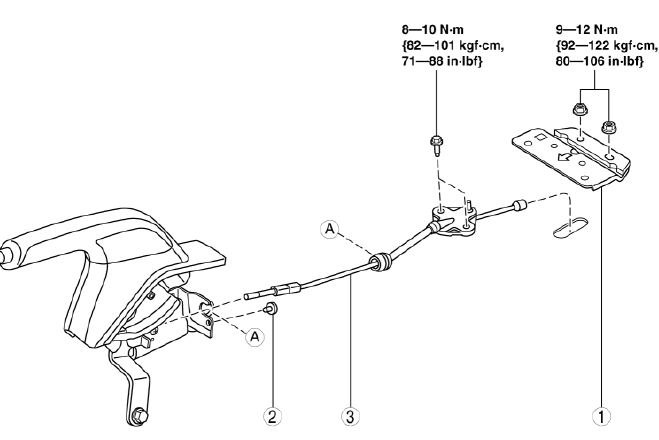
PARKING BRAKE LEVER REMOVAL/INSTALLATION
1. Remove the rear console. (See REAR CONSOLE REMOVAL/INSTALLATION).
2. Remove in the order indicated in the table.
3. Install in the reverse order of removal.
4. After installation, inspect the parking brake stroke and adjust if necessary. (See PARKING BRAKE LEVER INSPECTION).
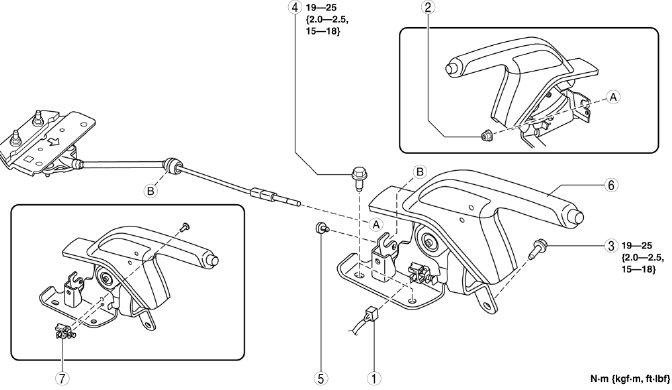
- Parking brake switch connector
- Adjusting nut
- Bolt
- Bolt
- Clip
- Parking brake lever
- Parking brake switch
Bolt Removal Note
1. Move the front seat (LH) forward.
2. Perform the work from the rear seat, flip over the floor covering.
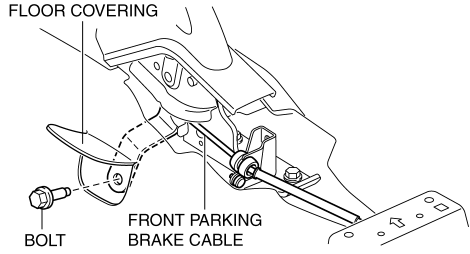
3. Remove the bolt.
Clip Removal Note
1. Remove the clip.
2. Remove the front parking brake cable from the parking brake lever.
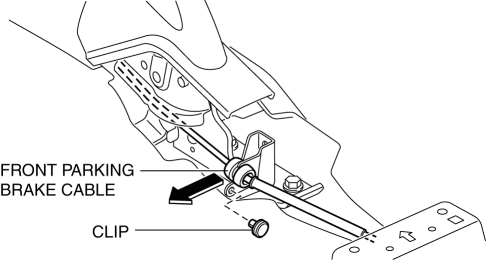
Clip Installation Note
1. Install the front parking brake cable to the parking brake lever.
2. Install the clip.
FRONT PARKING BRAKE CABLE REMOVAL/INSTALLATION
1. Remove the rear console. (See REAR CONSOLE REMOVAL/INSTALLATION).
2. Remove the adjusting nut.

3. Remove the TWC. (See EXHAUST SYSTEM REMOVAL/INSTALLATION).
4. Remove the insulator No.1. (See EXHAUST SYSTEM REMOVAL/INSTALLATION).
5. Remove the front parking brake cable from the equalizer.
6. Remove in the order indicated in the table.
7. Install in the reverse order of removal.
8. After installation, inspect the parking brake stroke and adjust if necessary. (See PARKING BRAKE LEVER INSPECTION).
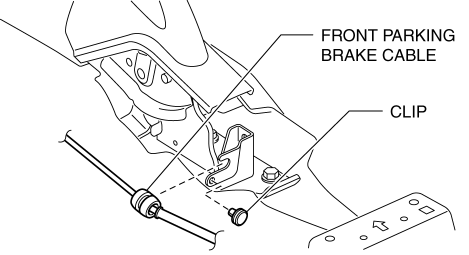
- Bracket
- Clip
- Front parking brake cable
Front Parking Brake Cable Removal Note
1. Separate the floor mat at the area shown in the figure.
2. Remove the front parking brake cable.
REAR PARKING BRAKE CABLE REMOVAL/INSTALLATION
1. Remove the console panel. (See REAR CONSOLE REMOVAL/INSTALLATION).
2. Loosen the adjusting nut shown in the figure only enough that it does not come off.
3. Release the parking brake.
4. Remove the TWC. (See EXHAUST SYSTEM REMOVAL/INSTALLATION).
5. Remove the insulator No.1 and insulator No.2. (See EXHAUST SYSTEM REMOVAL/INSTALLATION).
6. Remove in the order indicated in the table.
7. Install in the reverse order of removal.
8. After installation, inspect the parking brake stroke and adjust if necessary. (See PARKING BRAKE LEVER INSPECTION).
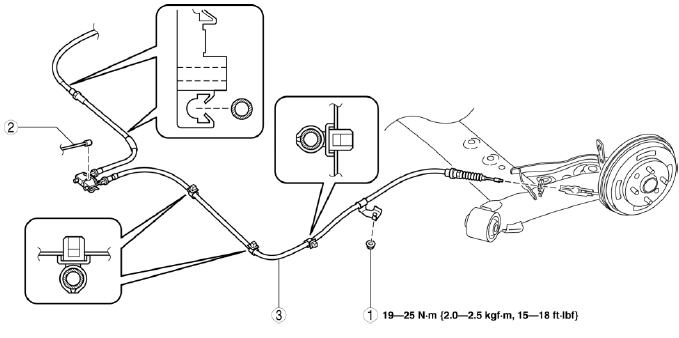
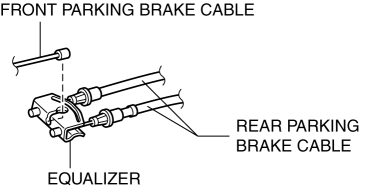
- Nut
- Front parking brake cable
- Rear parking brake cable
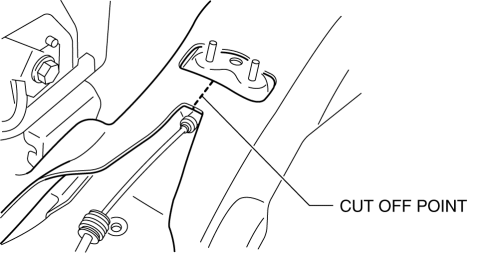
Rear Parking Brake Cable Removal Note
1. Bend the end cable tab in the direction shown in the figure.
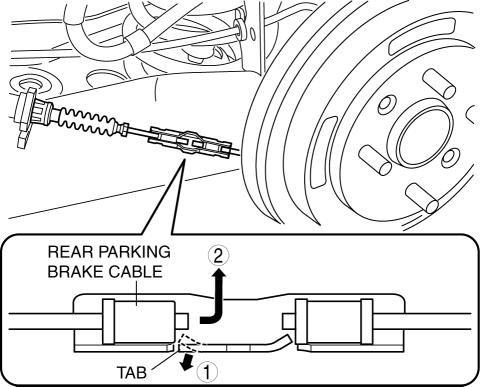
2. Move the rear parking brake cable end in the direction shown in the figure and disconnect it from the end cable.
Rear Parking Brake Cable Installation Note
1. Move the rear parking brake cable end in the direction shown in the figure and install it to the end cable.
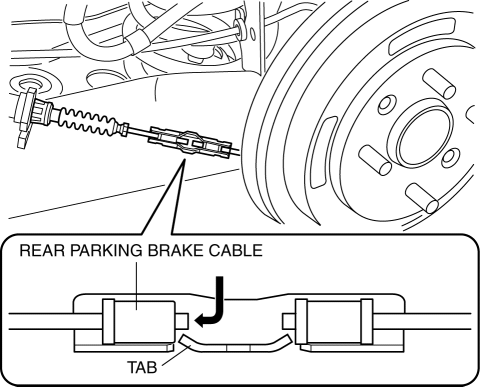
2. Verify that the end cable tab is attached properly to the rear parking brake cable end as shown in the figure.
END CABLE REMOVAL/INSTALLATION
1. Remove the brake shoe. (See REAR BRAKE (DRUM) REMOVAL/INSTALLATION).
2. Remove in the order indicated in the table.
3. Install in the reverse order of removal.
4. After installation, inspect the parking brake stroke and adjust if necessary. (See PARKING BRAKE LEVER INSPECTION).
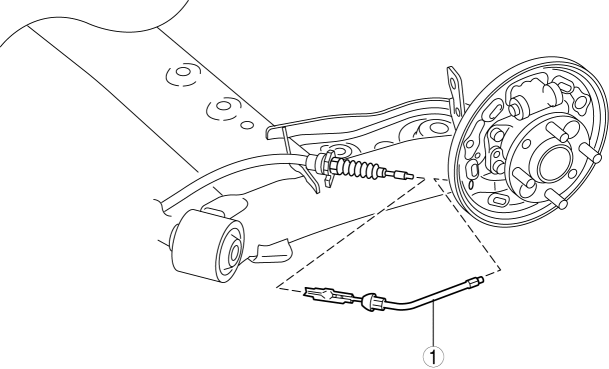
- End cable
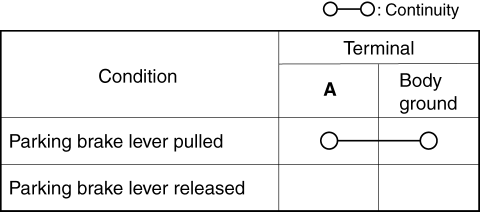
PARKING BRAKE SWITCH INSPECTION
1. Disconnect the parking brake switch connector.
2. Verify that the continuity is as indicated in the table.
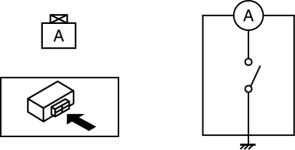
- If not as indicated in the table, replace the parking brake lever.