Mazda 2: Brake Fluid
BRAKE FLUID INSPECTION
1. Verify that the brake fluid level in the reserve tank is between the MAX and MIN marks.
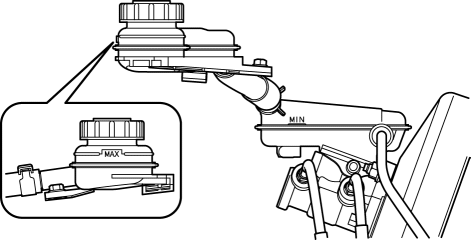
- If the brake fluid level is below the MIN mark, add brake fluid.
BRAKE FLUID AIR BLEEDING
CAUTION:
- Keep the fluid level in the reservoir at 3/4 full or more during the air bleeding.
- Be careful not to spill brake fluid on any painted surfaces. Rinse off any spilled brake fluid with water.
- Begin air bleeding with the brake equipment that is furthest from the master cylinder.
Specified fluid
- SAE J1703 or FMVSS116 DOT-3
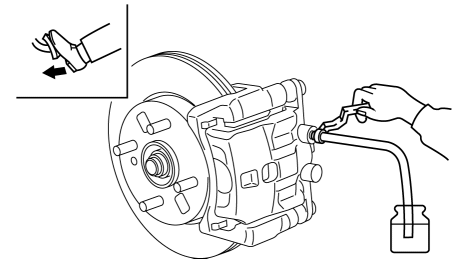
1. Remove the bleeder cap on the brake caliper or wheel cylinder, and attach a vinyl tube to the bleeder screw.
2. Place the other end of the vinyl tube in a clear container and fill the container with fluid during air bleeding.
3. Working with two people, one should pump the brake pedal several times and depress and hold the pedal down.
4. While one technician depresses the brake pedal, another technician loosens the bleeder screw using any commercially available flare nut wrench, drain out any fluid containing air bubbles, and then tighten the bleeder screw.
Tightening Torque
- Front: 6.9-9.8 N*m {71-99 kgf*cm, 62-86 in*lbf}
- Rear: 6.9-8.8 N*m {71-89 kgf*cm, 62-77 in*lbf}
5. Repeat Steps 3 and 4 until no air bubbles are seen.
6. Perform air bleeding in the order of the procedure described above for all brake calipers or wheel cylinders.
7. After air bleeding, inspect the following:
- Brake operation
- Fluid leak(s)
- Fluid level (See BRAKE FLUID INSPECTION).
VACUUM LINE INSPECTION
1. Remove the vacumn hose. (See VACUUM HOSE REMOVAL/INSTALLATION).
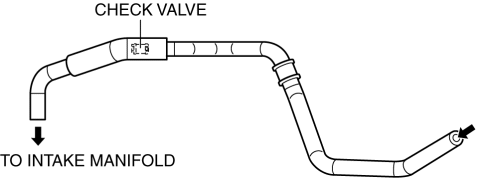
2. Verify that air flows through to the intake manifold side when blown by mouth from the vacumn hose of the power brake unit, and that air does not flow through to the power brake unit when blown in the opposite direction from the intake manifold.
- If there is any malfunction in the inner area of the check valve, replace it together with the vacuum hose as a single unit.
3. Install the vacumn hose. (See VACUUM HOSE REMOVAL/INSTALLATION).
VACUUM HOSE REMOVAL/INSTALLATION
1. Remove in the order indicated in the table.
2. Install in the reverse order of removal.
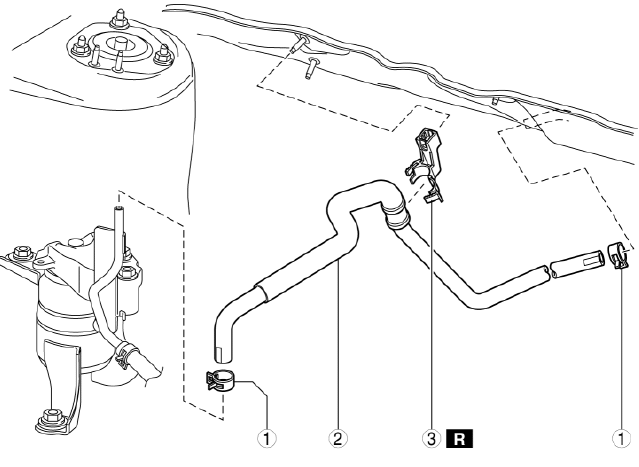
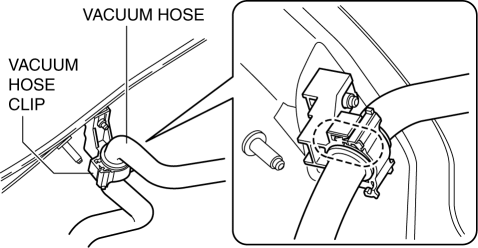
- Hose clamp
- Vacuum hose
- Vacuum hose clip
Vacuum Hose Installation Note
1. Install the vacuum hose to the vacuum hose clip as shown in the figure.