Mazda 2: Fuel-filler Lid Opener Cable
FUEL-FILLER LID OPENER CABLE REMOVAL/INSTALLATION
1. Disconnect the negative battery cable.
2. Remove the following parts:
- Front seat (driver's seat) (See FRONT SEAT REMOVAL/INSTALLATION).
- Front scuff plate (driver's side) (See FRONT SCUFF PLATE REMOVAL/INSTALLATION).
- Rear scuff plate (LH) (See REAR SCUFF PLATE REMOVAL/INSTALLATION).
- Rear seat back (See REAR SEAT BACK REMOVAL/INSTALLATION).
- Rear seat cushion (See REAR SEAT CUSHION REMOVAL/INSTALLATION).
- Trunk end trim (See TRUNK END TRIM REMOVAL/INSTALLATION).
- Trunk side trim (LH) (See TRUNK SIDE TRIM REMOVAL/INSTALLATION).
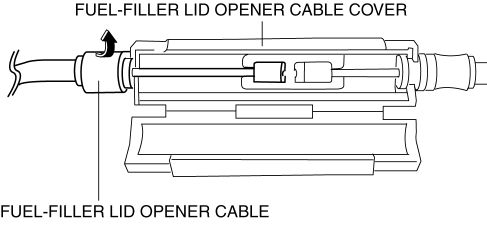
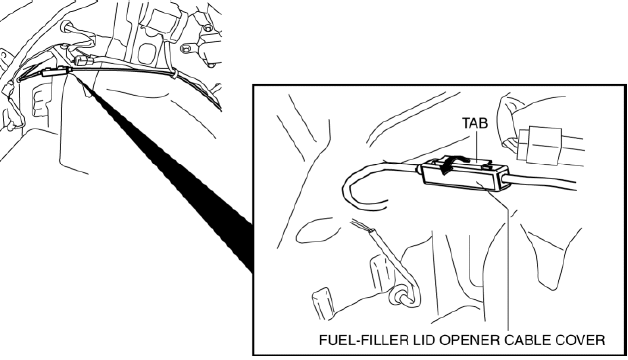
3. Open the fuel-filler lid opener cable cover.
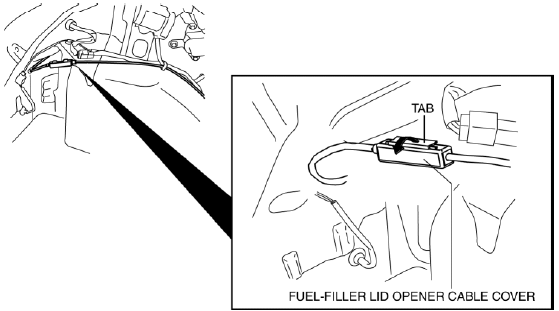
4. Disconnect the fuel-filler lid opener cable from the fuel-filler lid opener cable cover.
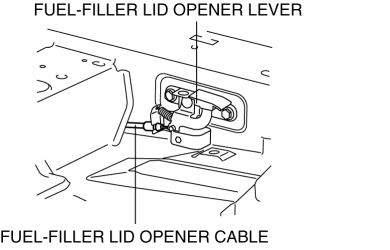
5. Flip over the floor mat and remove the cable from the fuel-filler lid opener lever.
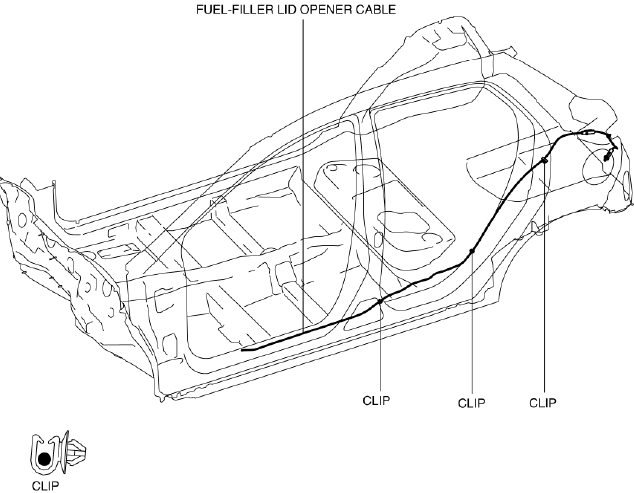
6. Remove the fuel-filler lid opener cable.
7. Install in the reverse order of removal.
FUEL-FILLER LID OPENER AND LEVER REMOVAL/INSTALLATION
Fuel-filler Lid Opener
1. Open the fuel-filler lid.
2. Remove the following parts:
- Rear scuff plate (LH) (See REAR SCUFF PLATE REMOVAL/INSTALLATION).
- Rear seat cushion (See REAR SEAT CUSHION REMOVAL/INSTALLATION).
- Rear seat back (See REAR SEAT BACK REMOVAL/INSTALLATION).
- Trunk end trim (See TRUNK END TRIM REMOVAL/INSTALLATION).
- Trunk side trim (LH) (See TRUNK SIDE TRIM REMOVAL/INSTALLATION).
3. Open the fuel-filler lid opener cable cover.
4. Disconnect the release cable from the fuel-filler lid opener cable cover.

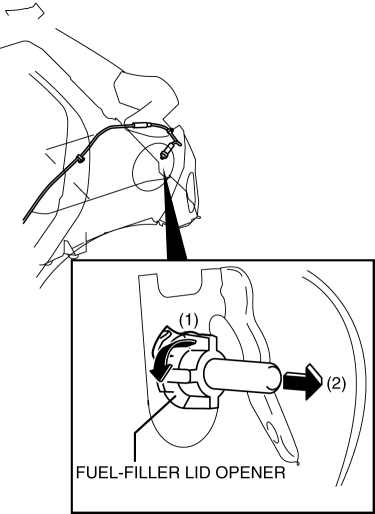
5. Rotate the fuel-filler lid opener in the direction of the arrow (1) as shown in the figure and pull it out in the direction of the arrow (2).
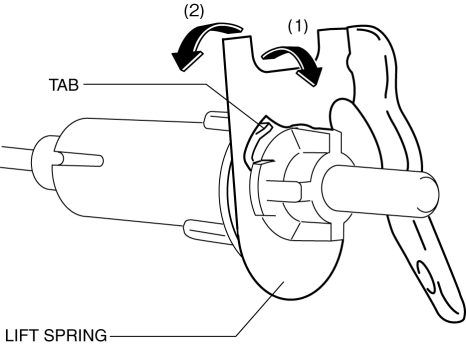
6. Pull the lift spring in the direction of arrow (1) shown in the figure to remove it from the tab.
7. While keeping the lift spring in the condition of Step 6, rotate the lift spring in the direction of arrow (2) shown in the figure to remove it.
8. Install in the reverse order of removal.
Fuel-filler Lid Opener Lever
1. Remove the front scuff plate. (Driver's side) (See FRONT SCUFF PLATE REMOVAL/INSTALLATION).
2. Remove the front side trim. (Driver's side) (See FRONT SIDE TRIM REMOVAL/INSTALLATION).
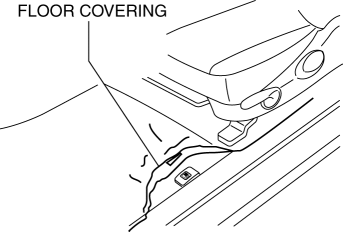
3. Partially peel back the floor covering.
4. Remove the bolts.

5. Disconnect the cable and fuel-filler lid opener lever.
6. Install in the reverse order of removal.

