Mazda 2: Intermediate Shaft
INTERMEDIATE SHAFT REMOVAL/INSTALLATION
WARNING:
- The steering column (EPS motor) temperature increases directly after continuous turning of the steering mechanism which could cause burns if it is touched. Before performing any servicing, verify that the steering column has cooled off.
CAUTION:
- The EPS will not operate correctly if the steering shaft is installed after it has been rotated once accidentally. After removing the intermediate shaft, be careful not to rotate the steering shaft until the intermediate shaft is installed to the steering gear (pinion).
- If the EPS steering angle calibration is not completed, the EPS will not
operate properly.
After replacing the intermediate shaft, if the EPS warning light illuminates or flashes when the steering wheel is turned lock-to-lock with the engine started, always carry out the EPS steering angle calibration so that the EPS operates normally.
1. Remove the key and lock the steering wheel to immobilize the steering shaft.
2. Lock the tilt lever.
3. Remove in the order indicated in the table.
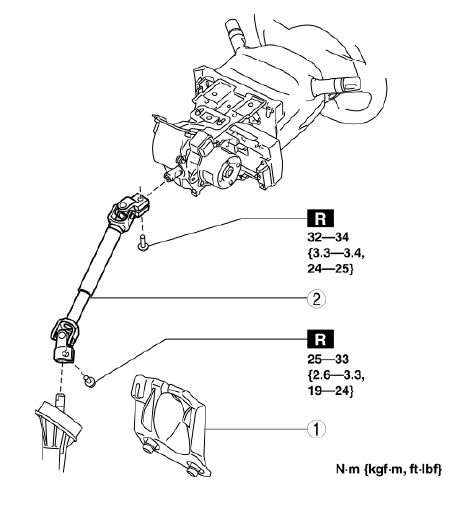
- Steering shaft cover
- Intermediate shaft
4. Install in the reverse order of removal.
5. After installation, perform the following procedure.
- Start the engine and turn the steering wheel lock-to-lock.
- If the EPS warning light illuminates or flashes, perform the EPS steering angle calibration. (See EPS STEERING ANGLE CALIBRATION).
Intermediate Shaft Removal Note
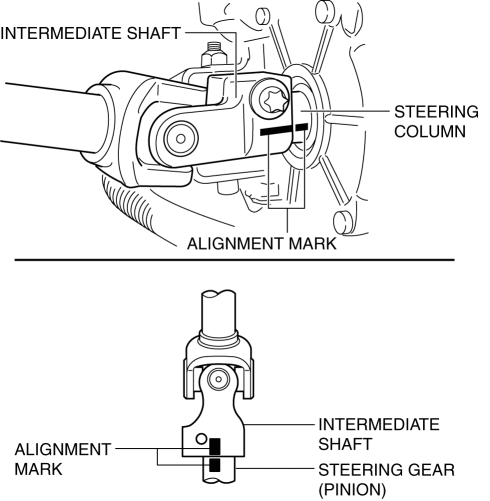
1. Place alignment marks on the steering column and the intermediate shaft, and steering gear (pinion) and the intermediate shaft as shown in the figure.
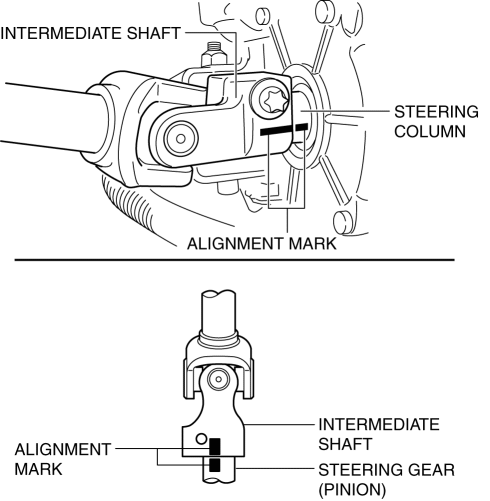
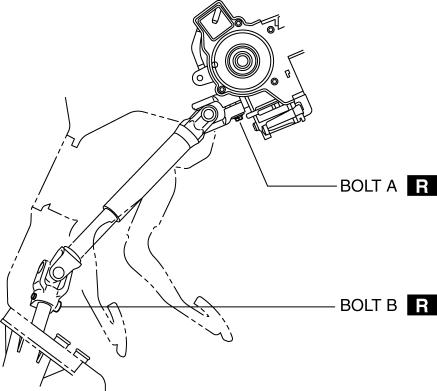
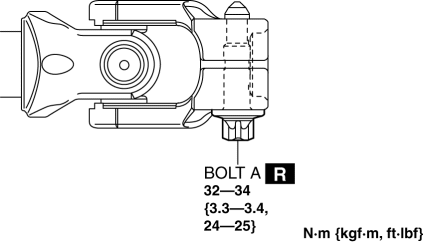
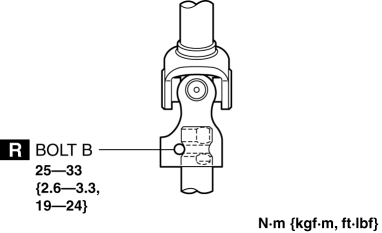
2. Remove bolt A and bolt B, and remove the intermediate shaft.
Intermediate Shaft Installation Note
1. Place alignment marks on the new intermediate shaft in the same positions as the removed intermediate shaft.
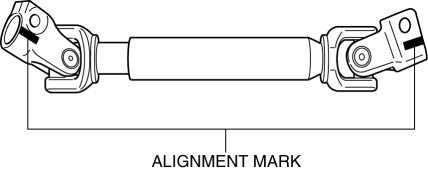
2. Align the alignment marks on the steering column and the steering gear (pinion), which were placed before removing the intermediate shaft, and install the intermediate shaft.
CAUTION:
- If the retaining part of the intermediate shaft is subjected to an impact, it could be damaged. Be careful not to impact the retaining part when extending the slide part.
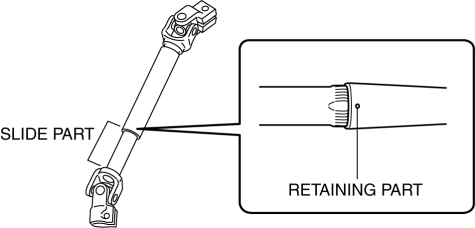
- If foreign matter penetrates the slide part, it could damage the intermediate shaft. Be careful not to allow foreign matter to penetrate the slide part.
3. Verify that the bolt A flange is seated in the specified position.
4. Verify that bolt B is installed to the groove of the steering gear (pinion).
STEERING SHAFT INSPECTION
1. Inspect the steering column for excessive play and damage.
2. Verify that the dimension of the steering shaft shown in the figure is as specified.
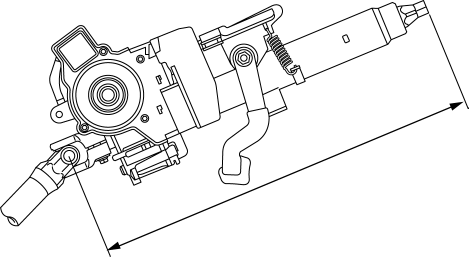
- If not within the specification, replace the steering column component.
Steering shaft length
- 443.7-449.7 mm {17.47-17.70 in}
3. Inspect the tilt mechanism operation for the following:
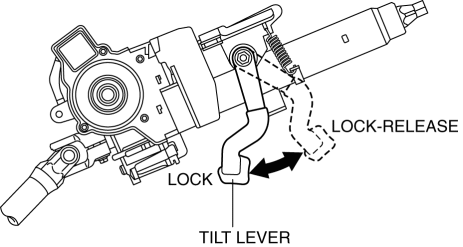
- The tilt lever moves smoothly from the lock to the lock-release position.
- The steering shaft is fixed firmly when the tilt lever is locked.
- If there is any malfunction, replace the steering column.

