Mazda 2: Steering Gear and Linkage
STEERING GEAR AND LINKAGE REMOVAL/INSTALLATION
1. Remove the steering shaft cover. (See STEERING WHEEL AND COLUMN REMOVAL/INSTALLATION).
2. Disconnect the intermediate shaft from the steering gear and linkage. (See STEERING WHEEL AND COLUMN REMOVAL/INSTALLATION).
CAUTION:
- The EPS will not operate properly if the installation is performed with the steering shaft rotated 360 degrees by mistake. After detaching the intermediate shaft, secure the steering shaft to prevent it from rotating until the intermediate shaft is installed to the steering gear and linkage.
- Secure the steering wheel using tape or a cable to prevent the steering shaft from rotating after disconnecting the steering shaft. If the steering wheel rotates after the steering shaft and the steering gear and linkage are disconnected, the internal parts of the clock spring could be damaged.
3. Remove in the order indicated in the table.
4. Install in the reverse order of removal.
5. After installation, inspect the front wheel alignment. (See FRONT WHEEL ALIGNMENT).
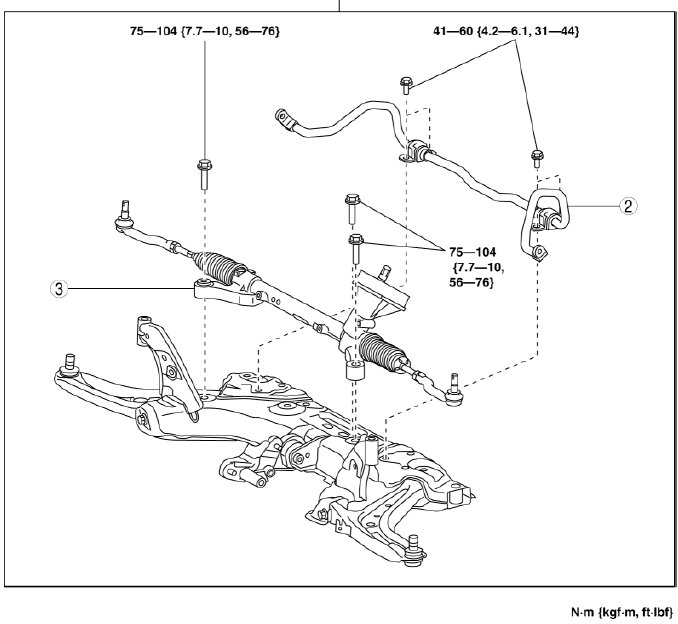
- Front crossmember component
- Front stabilizer component
- Steering gear and linkage
Steering Gear and Linkage Installation Note
1. Temporarily install the steering gear to the front crossmember using bolts.
2. Tighten the bolts to the specified torque.
STEERING GEAR AND LINKAGE INSPECTION
1. Remove the steering gear and linkage. (See STEERING GEAR AND LINKAGE REMOVAL/INSTALLATION).
2. Remove the tie-rod end and boot. (See STEERING GEAR AND LINKAGE DISASSEMBLY).
3. Measure the rotation torque of the pinion shaft using a crescent wrench and pull scale.
(speed measurement reference 90-120

