Mazda 2: Coil Antenna
COIL ANTENNA REMOVAL/INSTALLATION
1. Disconnect the negative battery cable.
2. Remove the column cover. (See COLUMN COVER REMOVAL/INSTALLATION).
3. Disconnect the coil antenna connector.
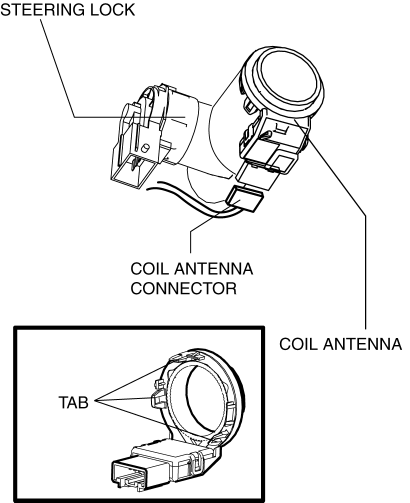
4. Detach the coil antenna hooks and remove the coil antenna from the steering lock.
5. Install in the reverse order of removal.
LIFTGATE OPENER SWITCH REMOVAL/INSTALLATION
1. Disconnect the negative battery cable.
2. Remove the liftgate lower trim. (See LIFTGATE LOWER TRIM REMOVAL/INSTALLATION).
3. Disconnect the connector.
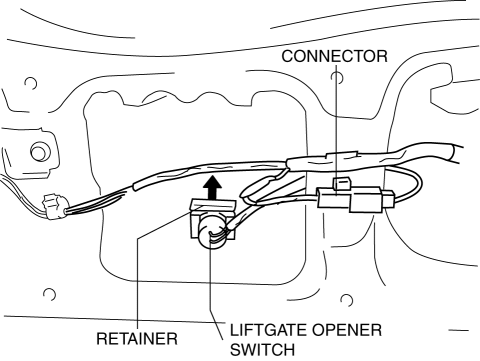
4. Pull out the retainer in the direction of the arrow.
5. Remove the liftgate opener switch.
6. Install in the reverse order of removal.
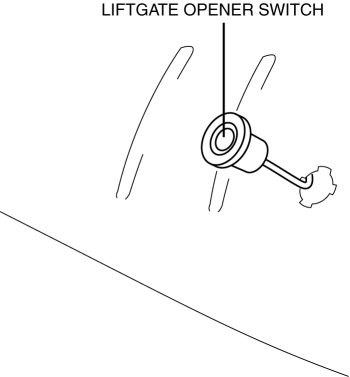
LIFTGATE OPENER SWITCH INSPECTION
1. Disconnect the negative battery cable.
2. Remove the liftgate lower trim. (See LIFTGATE LOWER TRIM REMOVAL/INSTALLATION).
3. Remove the liftgate opener switch. (See LIFTGATE OPENER SWITCH REMOVAL/INSTALLATION).
4. Verify the continuity of liftgate opener switch terminals A and B.
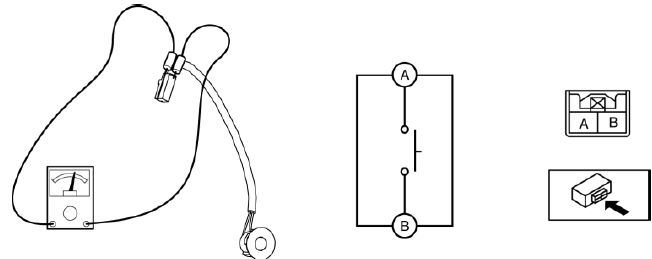
5. Verify that the continuity is as indicated in the table.
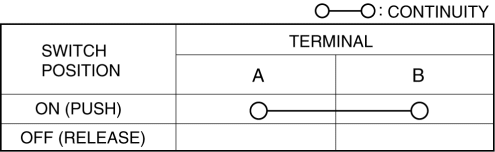
- If not as indicated in the table, replace the liftgate opener switch.
SECURITY ACCESS PROCEDURE
1. Connect the M-MDS (IDS) to the DLC-2.
2. After the vehicle is identified, select the following items from the initialization screen of the IDS.
- Select the "Body"
- Select the "Security"
- Select the "PATS Functions"
3. Then, select items from the screen menu in the following order.
- Program Additional Advanced Key
- Advanced Key Code Erase and Program
- Steering Lock Unit Programming
- Program Additional Ignition Key
- Ignition Key Code Erase and Program
- Customer Spare Key Programming Enable
- Customer Spare Key Programming Disable
- Parameter Reset
4. Perform the security access according to the directions on the M-MDS screen.

