Mazda 2: Front Outer Handle
FRONT OUTER HANDLE REMOVAL/INSTALLATION
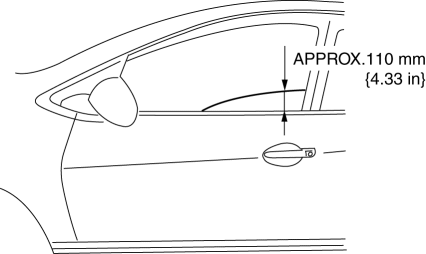
1. To access the glass installation bolt, position the front door glass so that the distance from the top of the front door glass to the upper part of the front beltline molding is approx. 110 mm {4.33 in}.
2. Disconnect the negative battery cable.
3. Remove the following parts:
- Inner garnish (See INNER GARNISH REMOVAL/INSTALLATION).
- Front door trim (See FRONT DOOR TRIM REMOVAL/INSTALLATION).
- Front door speaker (See FRONT DOOR SPEAKER REMOVAL/INSTALLATION).
- Front door glass (See FRONT DOOR GLASS REMOVAL/INSTALLATION).
- Front door module panel (See FRONT DOOR MODULE PANEL REMOVAL/INSTALLATION).
- Rod protector (See FRONT DOOR KEY CYLINDER REMOVAL/INSTALLATION).
- Front door key cylinder (See FRONT DOOR KEY CYLINDER REMOVAL/INSTALLATION).
4. Press the hook on the front outer handle bracket in the direction of the arrow.
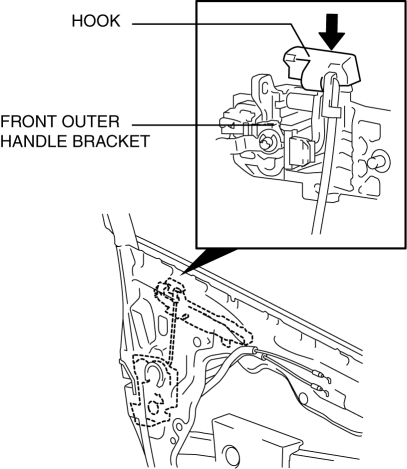
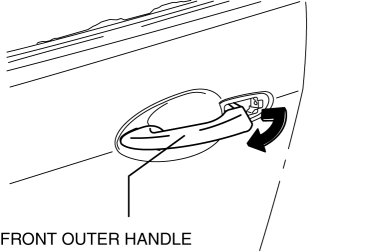
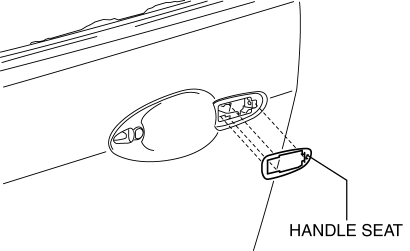
5. Maintaining the condition in procedure 4, remove the front outer handle.
6. Remove the handle protector and handle seat.
7. Remove the double-sided adhesive tape from the handle protector and body. (See Outer handle bracket Installation Note).
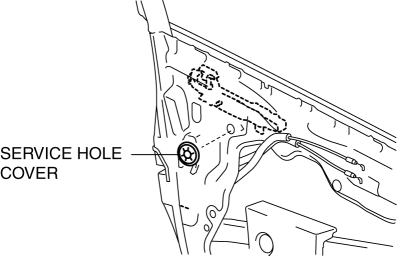
8. Remove the service hole cover.
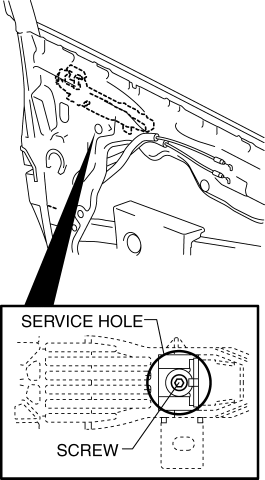
9. Remove the screw from the service hole.
NOTE:
- The screw cannot be removed because of the stopper.
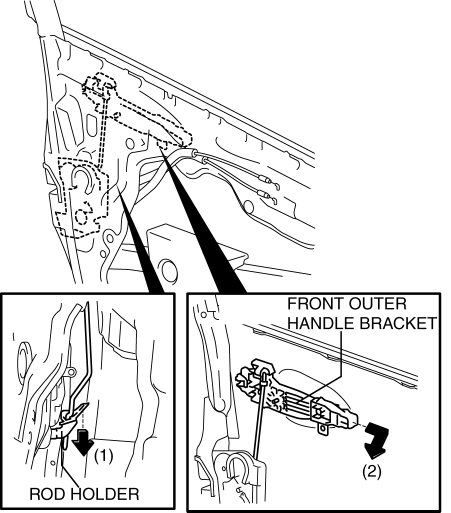
10. Press down the rod holder in the direction of arrow (1) and remove the front outer handle bracket in the direction of arrow (2).(See Outer handle bracket Installation Note).
11. Install in the reverse order of removal.
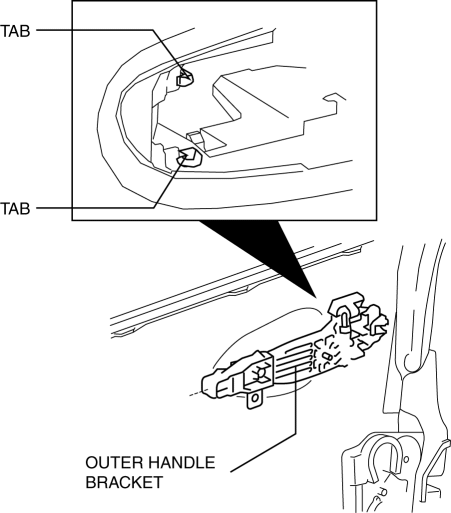
Outer handle bracket Installation Note
1. Hook the outer handle bracket tabs as shown in the figure.