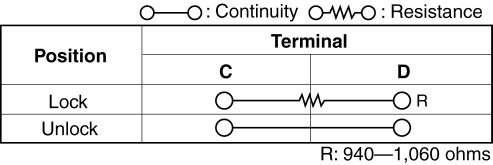
Mazda 2: Door Lock Switch
DOOR LOCK SWITCH REMOVAL/INSTALLATION
1. Disconnect the negative battery cable.
2. Remove the console panel. (See REAR CONSOLE REMOVAL/INSTALLATION).
3. Remove the screws.
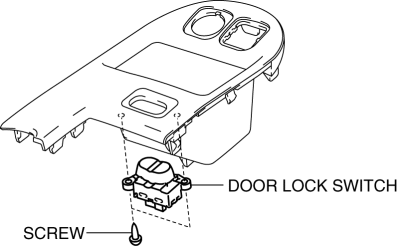
4. Disconnect the door lock switch connector.
5. Install in the reverse order of removal.
DOOR LOCK SWITCH INSPECTION
1. Inspect for continuity between the door lock switch terminals.
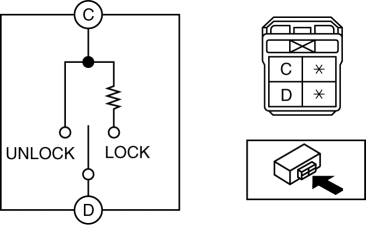
- If not as specified, replace the door lock switch.
HOOD LATCH AND RELEASE LEVER REMOVAL/INSTALLATION
Hood Latch
1. Open the hood.
2. Remove the bolts.
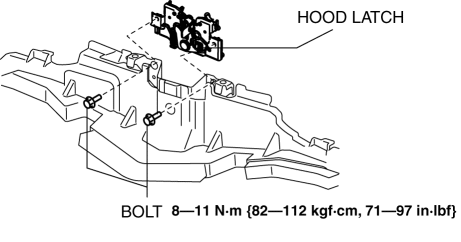
3. Remove the hood latch.
4. Install in the reverse order of removal.
5. Adjust the hood. (See HOOD ADJUSTMENT).
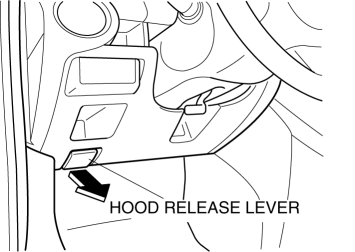
Hood Release Lever
1. Pull the hood release lever.
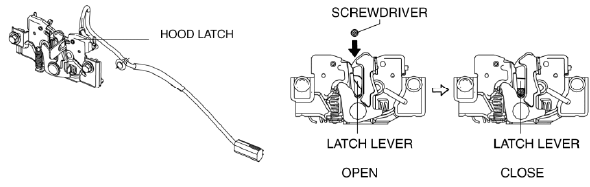
2. While maintaining the condition in procedure 1, insert a tape-wrapped flathead screwdriver as shown in the figure, press the ends of the tabs with the screwdriver in the direction of the arrows (1), pull the hood release lever in the direction of arrow (2), and then disconnect the lower panel.
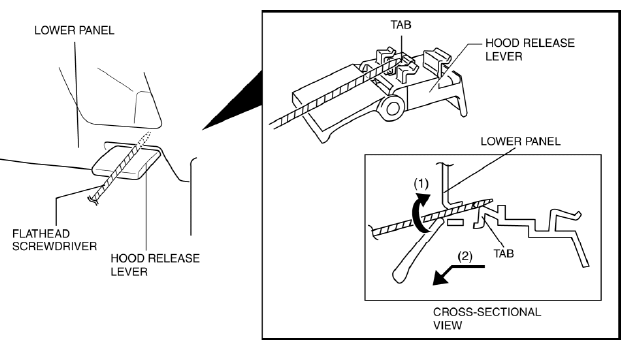
CAUTION:
- Remove the hood release lever while being careful not to damage the hood release cable with the flathead screwdriver.
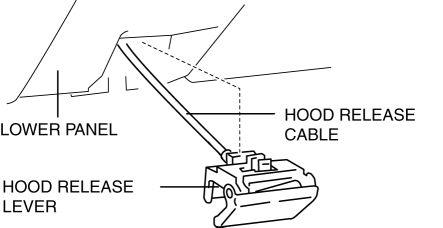
3. Pull the latch release lever outward, remove it from the lower panel, and then disconnect the hood release cable.
4. Install in the reverse order of removal.
HOOD RELEASE CABLE REMOVAL/INSTALLATION
1. Disconnect the negative battery cable. (Vehicle with front fog lights)
2. Remove the front bumper. (See FRONT BUMPER REMOVAL/INSTALLATION).
3. Remove the seal board upper. (See SEAL BOARD UPPER REMOVAL/INSTALLATION).
4. Remove the hood release lever. (See HOOD LATCH AND RELEASE LEVER REMOVAL/INSTALLATION).
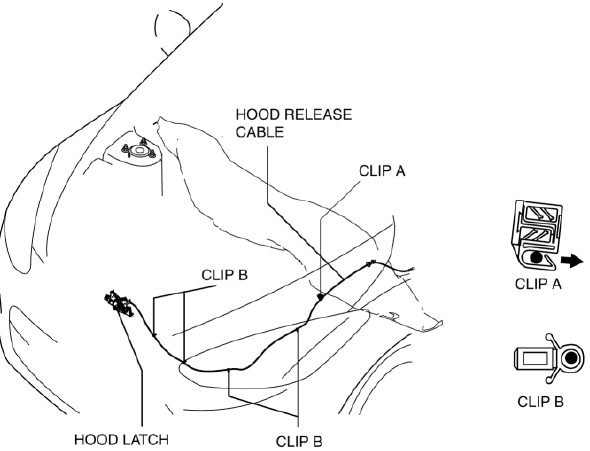
5. Remove the hood release cable from clips A.
6. Remove the clips B.
7. Disconnect the hood latch from the hood release cable.
8. Remove the hood release cable from outside of the vehicle.
9. Install in the reverse order of removal.
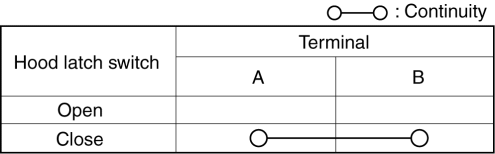
HOOD LATCH SWITCH INSPECTION
1. Disconnect the negative battery cable.
2. Remove the hood latch. (See HOOD LATCH AND RELEASE LEVER REMOVAL/INSTALLATION).
3. Press the latch in using a flathead screwdriver to inspect the latch lever condition.
4. Verify that the continuity is as indicated in the table.
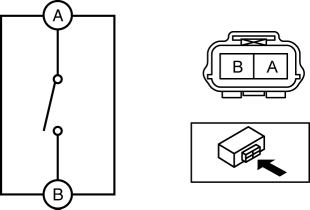
- If not as indicated in the table, replace the hood latch.