Mazda 2: Liftgate Latch and Lock Actuator
LIFTGATE LATCH AND LOCK ACTUATOR REMOVAL/INSTALLATION
1. Disconnect the negative battery cable.
2. Remove the liftgate lower trim. (See LIFTGATE LOWER TRIM REMOVAL/INSTALLATION)
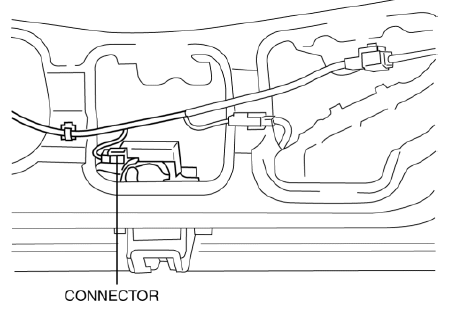
3. Disconnect the connector.
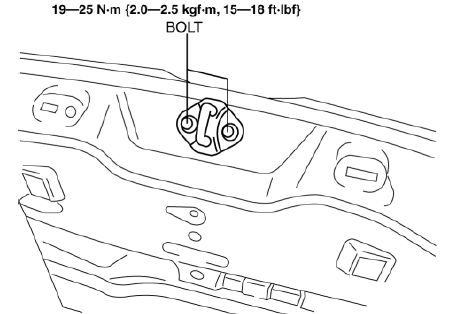
4. Remove the bolts.
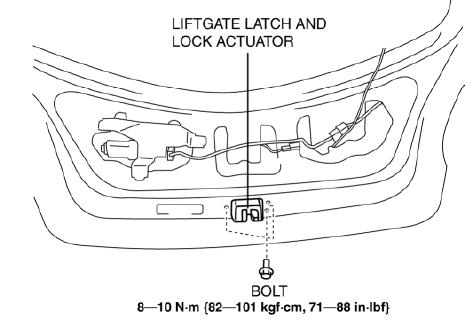
5. Remove the liftgate latch and lock actuator.
6. Install in the reverse order of removal.
LIFTGATE LATCH AND LOCK ACTUATOR INSPECTION
1. The following actuator and switch are integrated with the liftgate latch and lock actuator.
Inspect the liftgate latch and lock actuator according to each inspection procedure for the following items.
- Liftgate latch switch (See LIFTGATE LATCH SWITCH INSPECTION).
- Liftgate lock actuator (See LIFTGATE LOCK ACTUATOR INSPECTION).
LIFTGATE LOCK ACTUATOR INSPECTION
1. Disconnect the negative battery cable.
2. Remove the liftgate lower trim. (See LIFTGATE LOWER TRIM REMOVAL/INSTALLATION).
3. Remove the liftgate latch and lock actuator. (See LIFTGATE LATCH AND LOCK ACTUATOR REMOVAL/INSTALLATION).
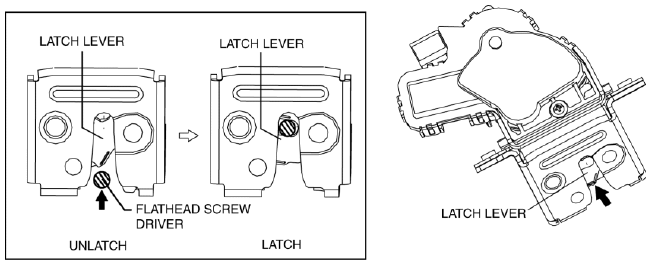
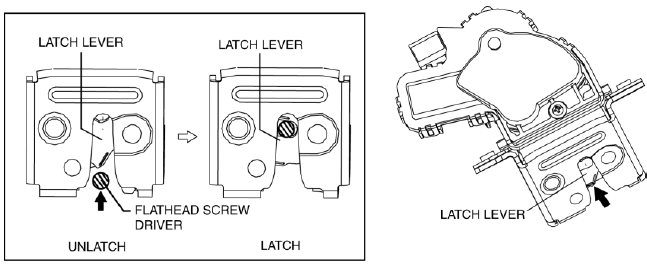
4. Press the latch in using a flathead screwdriver to inspect the latch lever condition.
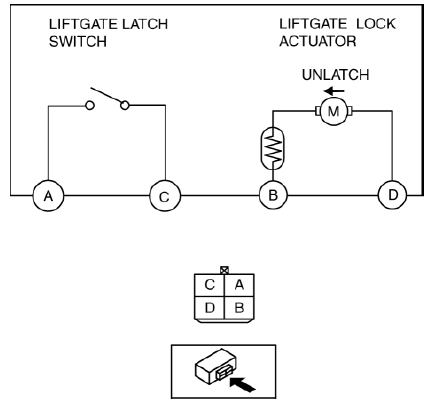
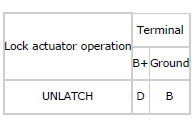
5. Apply battery positive voltage and connect the ground to each terminal, and then verify the operation.
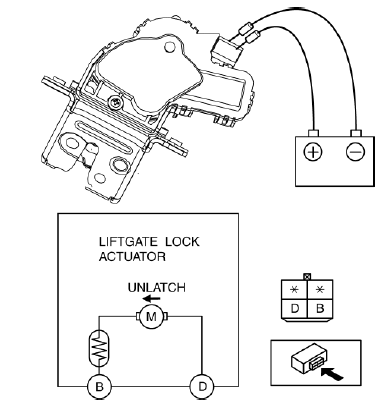
- If not as indicated in the table, replace the liftgate latch and lock actuator.
LIFTGATE LATCH SWITCH INSPECTION
1. Disconnect the negative battery cable.
2. Remove the liftgate lower trim. (See LIFTGATE LOWER TRIM REMOVAL/INSTALLATION).
3. Remove the liftgate latch and lock actuator. (See LIFTGATE LATCH AND LOCK ACTUATOR REMOVAL/INSTALLATION).
4. Press the latch in using a flathead screwdriver to inspect the latch lever condition.
5. Verify that the continuity is as indicated in the table.
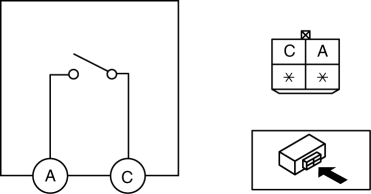
- If not as indicated in the table, replace the liftgate latch and lock actuator.

LIFTGATE LOCK STRIKER REMOVAL/INSTALLATION
1. Remove the trunk end trim. (See TRUNK END TRIM REMOVAL/INSTALLATION).
2. Remove the bolts, then remove the liftgate lock striker.
3. Install in the reverse order of removal.
4. Adjust the liftgate lock striker. (See LIFTGATE ADJUSTMENT).

