Mazda 2: EGR Valve
EGR VALVE REMOVAL/INSTALLATION
1. Disconnect the negative battery cable. (See BATTERY REMOVAL/INSTALLATION).
2. Remove the air cleaner cover. (See INTAKE-AIR SYSTEM REMOVAL/INSTALLATION).
NOTE:
- Because the air cleaner cover has already been removed and accessibility is assured, engine coolant can be drained without removing the battery.
3. Drain the engine coolant. (See ENGINE COOLANT REPLACEMENT).
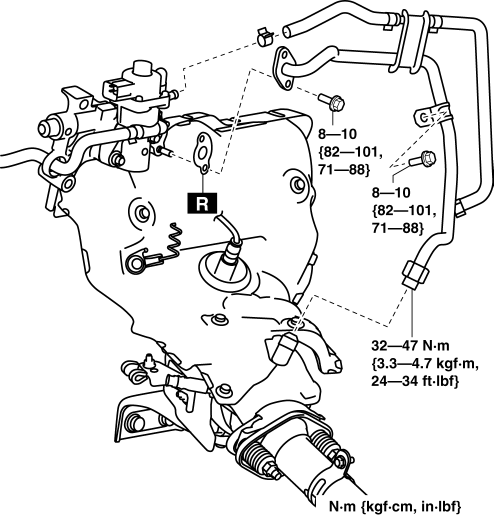
4. Remove in the order indicated in the table.
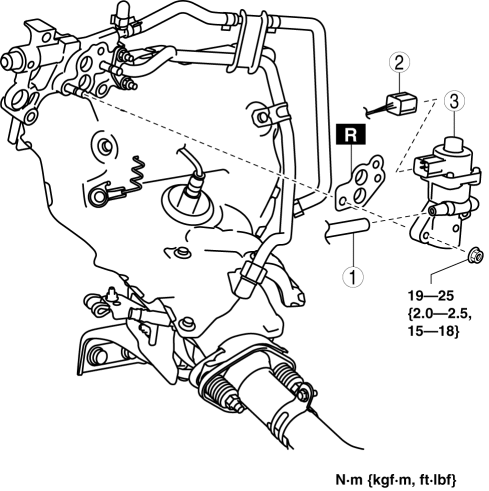
- Engine coolant hose
- EGR valve connector
- EGR valve
5. Install in the reverse order of removal.
EGR VALVE INSPECTION
Resistance Inspection
1. Disconnect the negative battery cable. (See BATTERY REMOVAL/INSTALLATION).
2. Disconnect the EGR valve connector.
3. Measure the resistance between the EGR valve terminals.
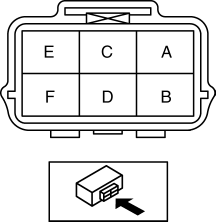
Standard
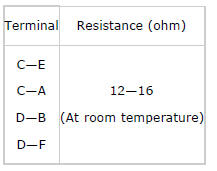
- If not within the specification, replace the EGR valve. (See EGR VALVE REMOVAL/INSTALLATION).
EGR PIPE REMOVAL/INSTALLATION
Intake Manifold Side
1. Remove the air cleaner cover. (See INTAKE-AIR SYSTEM REMOVAL/INSTALLATION).
2. Remove the fitting bolts of the EGR pipe (intake manifold side) using the procedure indicated in the figure.
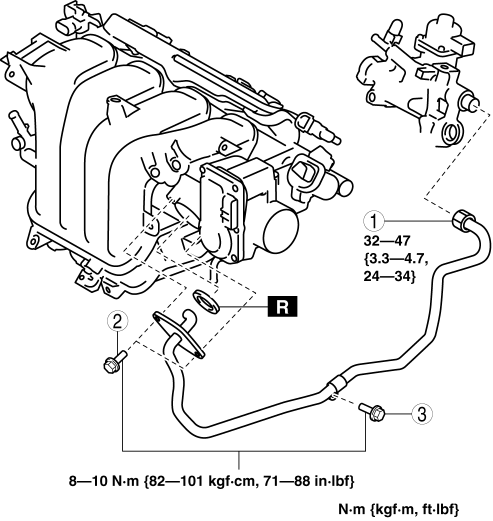
3. Set the oil filler tube out of the way. (See AUTOMATIC TRANSAXLE REMOVAL/INSTALLATION).
4. Remove the EGR pipe (intake manifold side).
5. Install in the reverse order of removal.
Exhaust Manifold Side
1. Remove the air cleaner cover. (See INTAKE-AIR SYSTEM REMOVAL/INSTALLATION).
NOTE:
- Because the air cleaner cover has already been removed and accessibility is assured, engine coolant can be drained without removing the battery.
2. Drain the engine coolant. (See ENGINE COOLANT REPLACEMENT).
3. Remove the EGR pipe (exhaust manifold side).
4. Install in the reverse order of removal.

